How to install PostgreSQL on Ubuntu OS With PgAdmin 4
-
PostgreSQL, often referred to as Postgres, is a powerful open-source object-relational database system. It is known for its robustness, scalability and support for advanced data types. in this guide, i'll walk you through the steps to install PostgreSQL on an Ubuntu operating system.
Prerequisites
Before we begin, ensure you have the following
- A system running Ubuntu (20.04 or later)
- A user account with sudo priviledges (Admin priviledge in the world of Windows)
- An internet connection
Step 1: Update your system
Update your package list to ensure you have the latest information on the newest versions of packages and their dependencies
sudo apt updateStep 2: Install PostgreSQL
i. Automated repository configuration:
sudo apt install -y postgresql-common
sudo /usr/share/postgresql-common/pgdg/apt.postgresql.org.sh
ii. Follow this steps to manually configure the APT repository. bored?{You can copy paste
") }
}# Import the repository signing key sudo apt install curl ca-certificates sudo install -d /usr/share/postgresql-common/pgdg sudo curl -o /usr/share/postgresql-common/pgdg/apt.postgresql.org.asc --fail https://www.postgresql.org/media/keys/ACCC4CF8.asc # Create the repository configuration file: sudo sh -c 'echo "deb [signed-by=/usr/share/postgresql-common/pgdg/apt.postgresql.org.asc] https://apt.postgresql.org/pub/repos/apt $(lsb_release -cs)-pgdg main" > /etc/apt/sources.list.d/pgdg.list' # Update the package lists sudo apt update # Install the latest version of PostgreSQL # If you want a specific version, use 'postgresql-16' or similar instead of 'postgresql' sudo apt -y install postgresqlStep 3: Verify the Installation
Once the installation is complete, verify that PostgreSQL is running.
sudo systemctl status postgresqlYou should see the status 'active', if not, you may need to repeat step 2
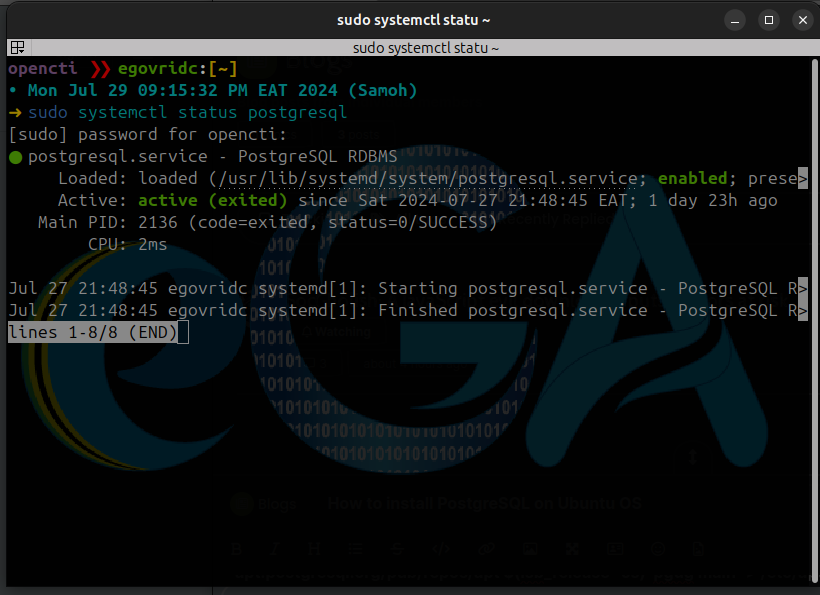
Yaay!, Now we have it. NOTE: To use PgAdmin 4, please skip to step 9
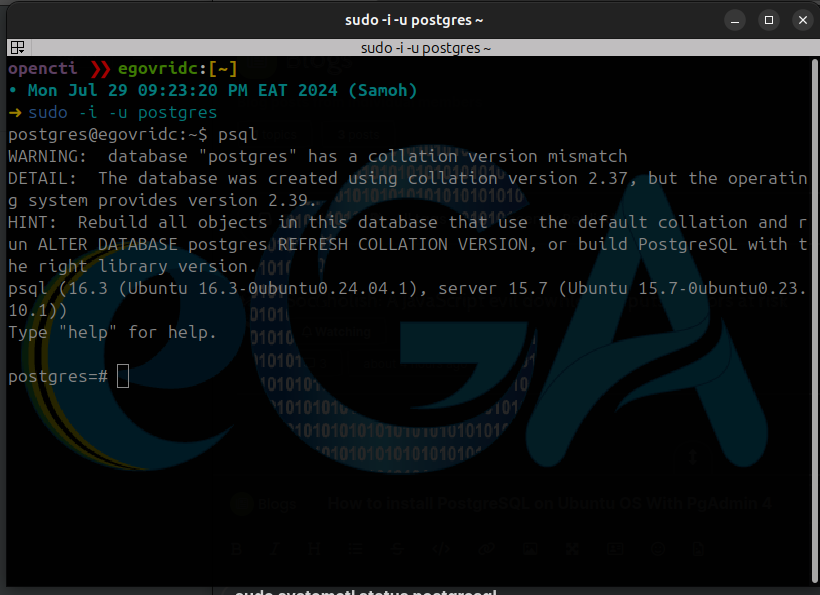
Step 4: Access the PostgreSQL Command Line
Now we need to switch to the PostgreSQL user account and access the PostgreSQL command line interface (CLI).
sudo -i -u postgres
# then to access the CLI
psql
You should now be at the PostgreSQL prompt (postgres=#), which looks like this (your terminal might be different
") )
)
Step 5: Create a New Database User
It's a good practice to create a new database user with superuser privileges for managing your databases.
CREATE USER yourusername WITH SUPERUSER CREATEDB CREATEROLE PASSWORD 'yoursecurepassword';Replace
yourusernameandyourpasswordwith your desired username and password respectively.Step 6: Create a New Database
Well, the reason you are installing this is to keep your application data at a centralized step right?
CREATE DATABASE yourdatabase;Replace
yourdatabasewith your desired database nameStep 7: Grant Privileges
Grant all privileges on the new database to your new user (of course you should always grant necessary privileges to a user based on the needs/usage of the application, i'm just saying Lol!
)GRANT ALL PRIVILEGES ON DATABASE yourdatabase TO yourusername;Step 8: Exit the PostgreSQL CLI
Exit the PostgreSQL command line interface.
\qNOTE: This steps are for working with PostgreSQL locally, if you need to access your PostgreSQL server remotely, be free to leave a comment below.
Installing PgAdmin 4
Step 9: Installing PgAdmin 4 (On Ubuntu and Distros using DEB package manager)
Install the public key for the repository (if not done previously):
curl -fsS https://www.pgadmin.org/static/packages_pgadmin_org.pub | sudo gpg --dearmor -o /usr/share/keyrings/packages-pgadmin-org.gpgCreate the repository configuration file:
sudo sh -c 'echo "deb [signed-by=/usr/share/keyrings/packages-pgadmin-org.gpg] https://ftp.postgresql.org/pub/pgadmin/pgadmin4/apt/$(lsb_release -cs) pgadmin4 main" > /etc/apt/sources.list.d/pgadmin4.list && apt update'Install pgAdmin (NOTE: If you have Apache running and don't want to interfere with it, install pgadmin4-desktop mode only)
o Install for both desktop and web modes:
sudo apt install pgadmin4o Install for desktop mode only:
sudo apt install pgadmin4-desktopo Install for web mode only:
sudo apt install pgadmin4-webConfigure the webserver, if you installed pgadmin4-web:
sudo /usr/pgadmin4/bin/setup-web.shNow if you skipped step 4, we need to do the following (here using postgres as default user). On your terminal run
sudo -u postgres psqlOnce you are inside psql (postgres=#)
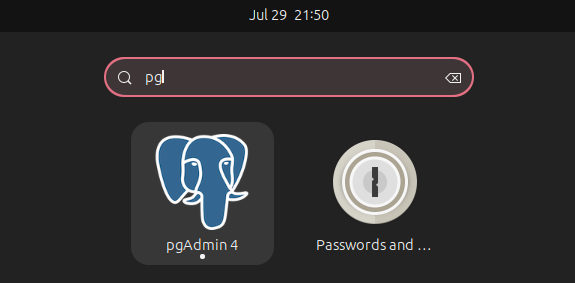
ALTER USER postgres WITH PASSWORD 'yourpassword';
quit
On your desktop, search for pgAdmin4
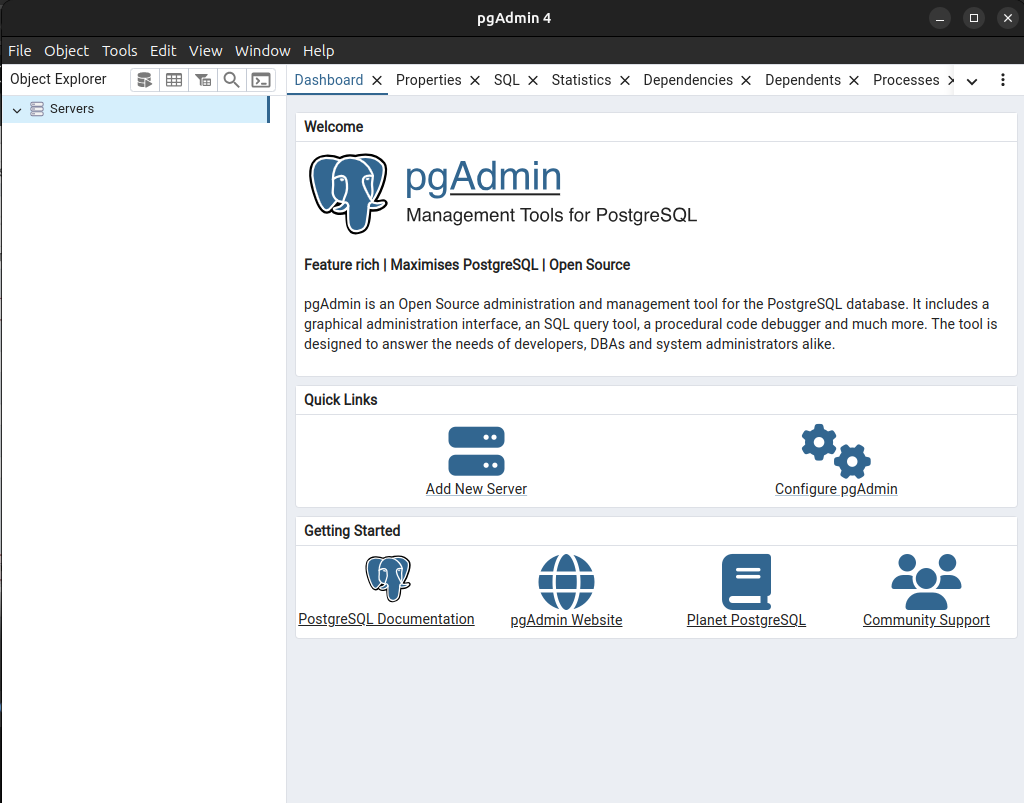
Wait for some minutes for it to start, you should then be presented with the following window
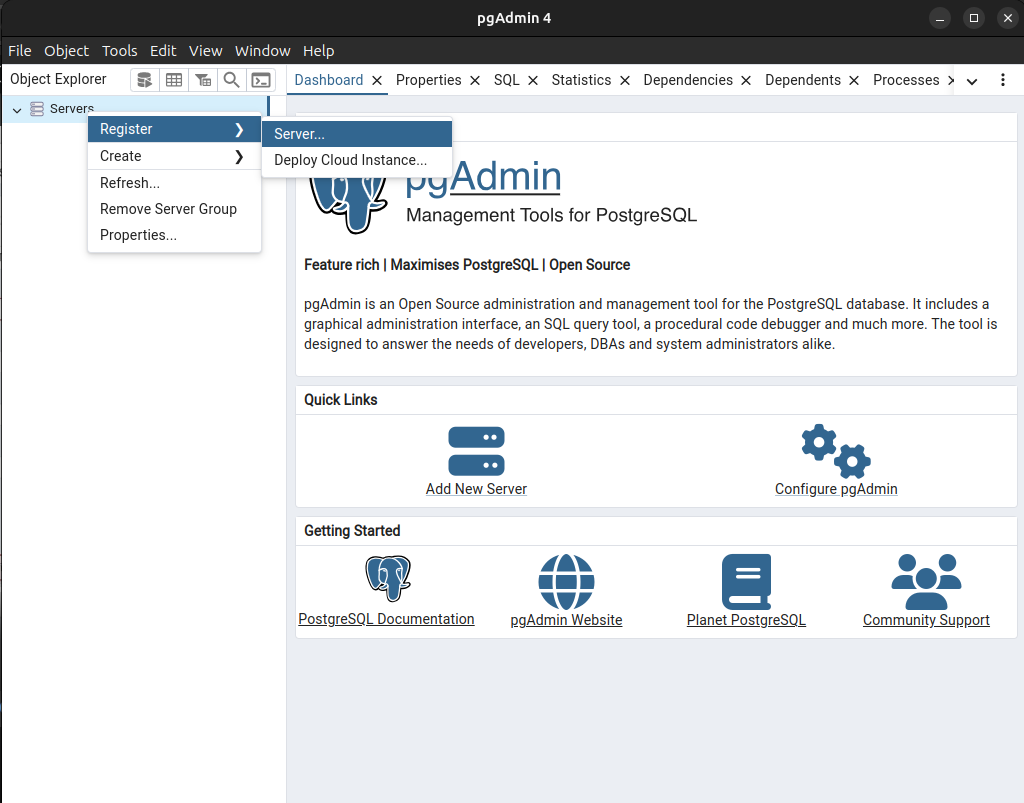
On the Top-Left right click on Servers > Register > Server
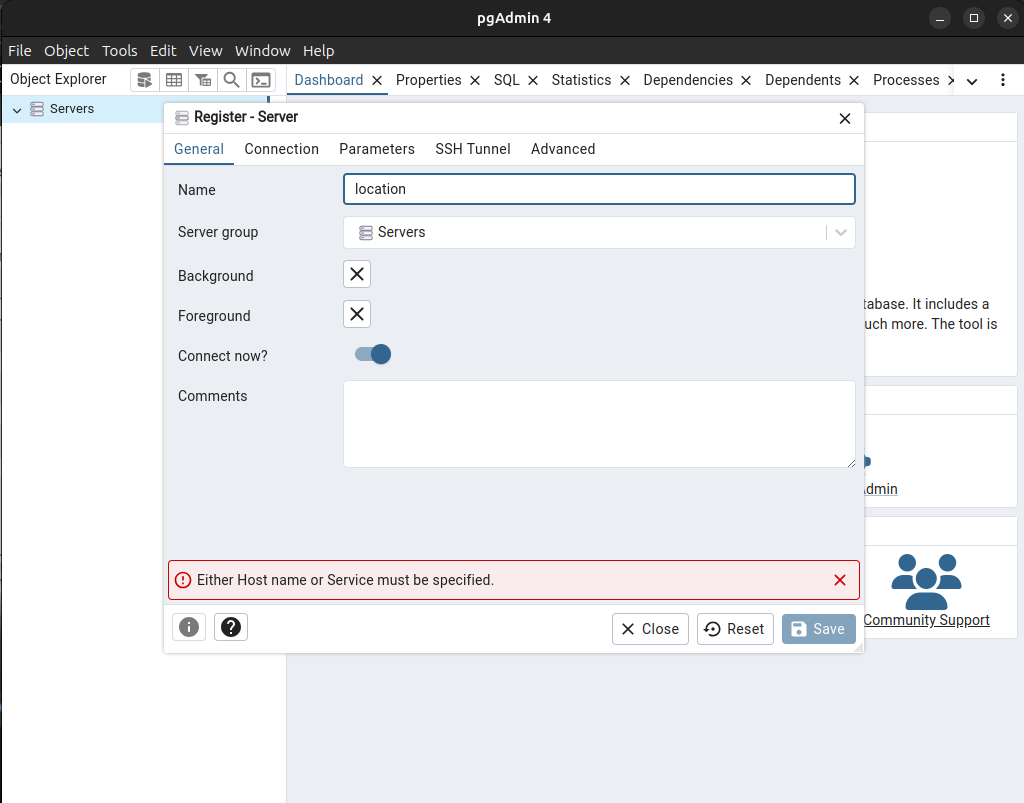
Fill out necessary information. In the Name field under general, i write localhost
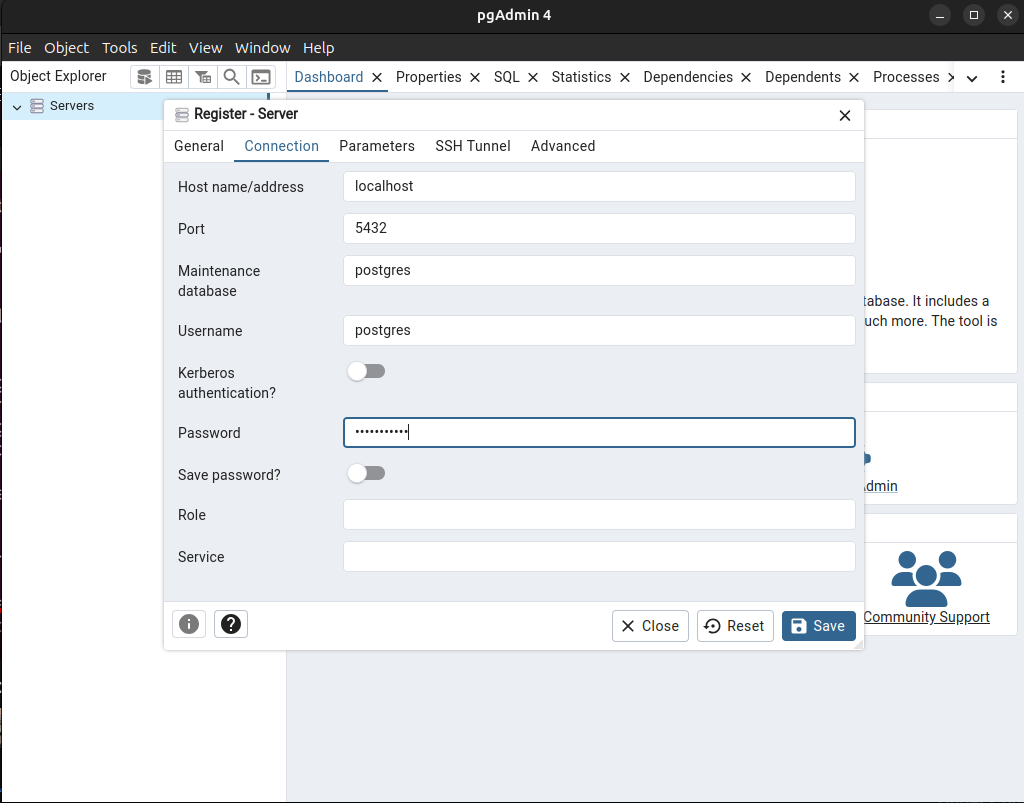
Under Connection tab, in the Host name/address field, i write localhost (since im using it locally), i leave the rest with their defaults for this case. In the password field, put in your password created at step 9, then click on 'Save' button at the bottom right corner of the popup window.
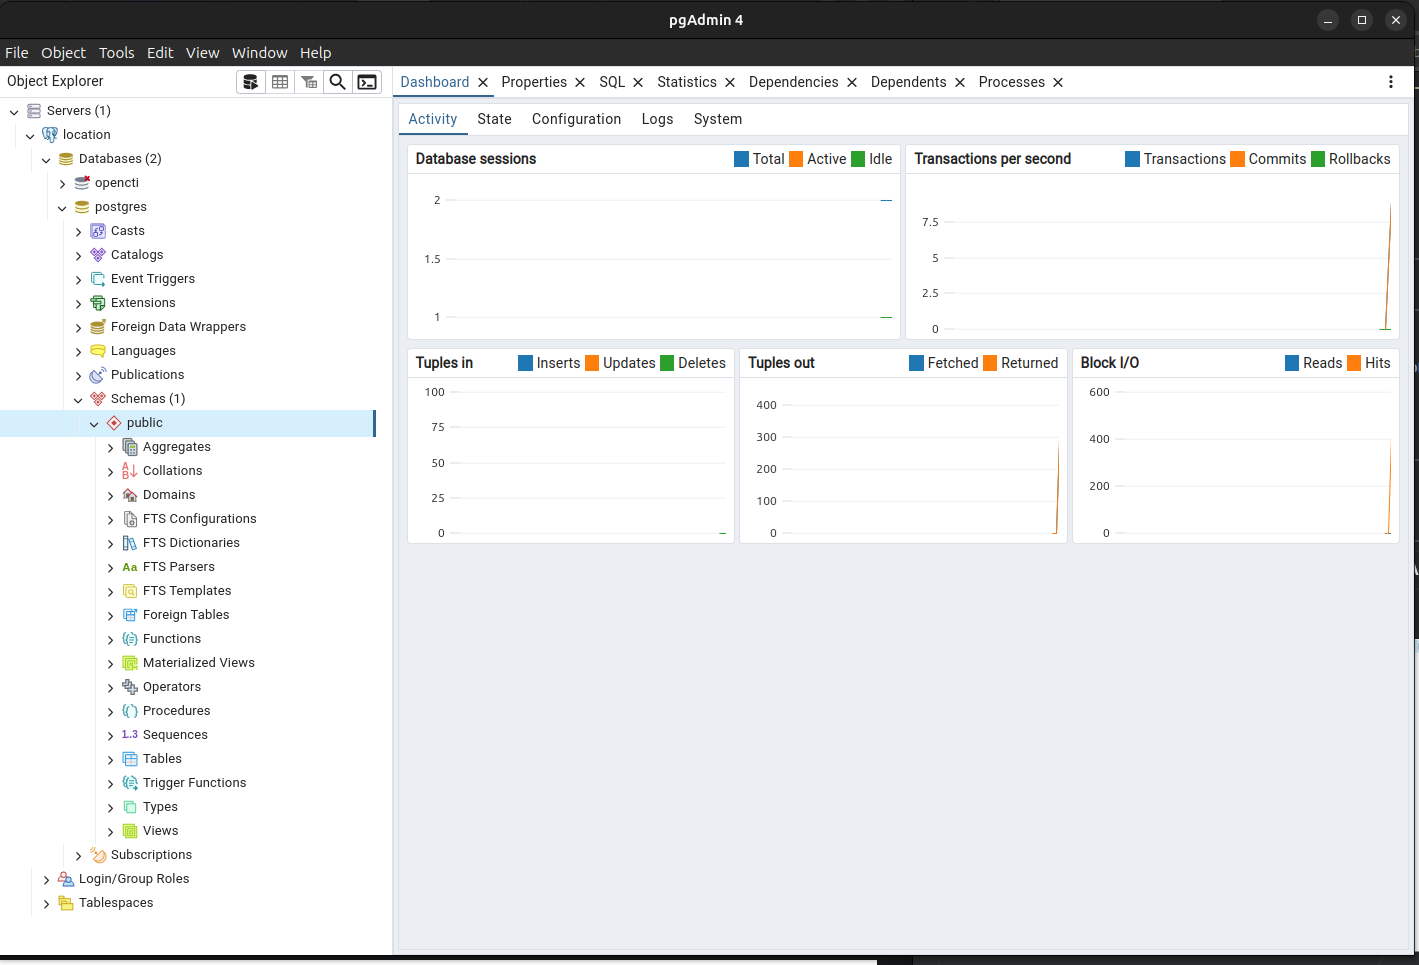
Now you should be presented with this nice view of pgAdmin4
For now, this should get you up and running!
I hope this steps have helped you gain some knowledge on installing PostgreSQL on Ubuntu OS.
Thank you for reaching this far!
If you find any errors, please feel free to comment them below.
#Tanzania
#kilimanjaro
#uhurunaumoja